How to enable two-factor authentication in Linux-based distributions in 5 easy steps

Two-factor authentication is a security mechanism that asks users to access an account after passing two layers of security. Generally, one layer of security is username and password and another layer is the passcode that may be static or generated at the time of authentication.
Most of the attacks may be avoided if users set a strong password and enable two-factor authentication. This blog guides you to enable factor authentication in Linux-based distributions in 5 easy steps.
Step 1: Open Terminal
Login into a Linux system and open a terminal screen.
Step 2: Install Google Authenticator
sudo apt install libpam-google-authenticator

Step 3: Configuration
Open Terminal and shoot the below command:
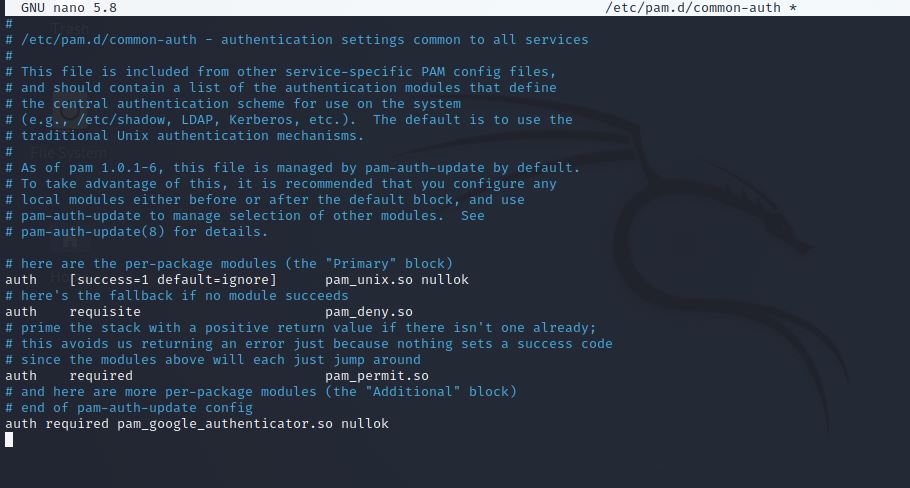
sudo nano /etc/pam.d/common-auth
Enter the below piece of code and save the file.
auth required pam_google_authenticator.so nullok
Step 4: Install Google Authenticator on your smartphone
Now, take your smartphone and install Google Authenticator on your device.
Step 5: Setup Google Authenticator
Open the Terminal screen and type the below command:
google-authenticator
Now, scan the QR code on your mobile device using the Google Authenticator app and add an account. After successful addition, a Linux account is added and 6 digits dynamic code is displayed on the screen. This code will change after 30 seconds.
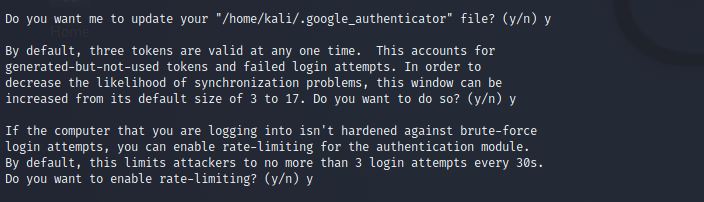
Provide answers to the following questions while setup google authenticator.
Do you want me to update your "/home/kali/.google_authenticator" file? (y/n) y
By default, three tokens are valid at any one time. This accounts for
generated-but-not-used tokens and failed login attempts. In order to
decrease the likelihood of synchronization problems, this window can be
increased from its default size of 3 to 17. Do you want to do so? (y/n) y
If the computer that you are logging into isn't hardened against brute-force
login attempts, you can enable rate-limiting for the authentication module.
By default, this limits attackers to no more than 3 login attempts every 30s.
Do you want to enable rate-limiting? (y/n) y
Step 5: Check whether two-factor authentication is enabled successfully or not
Log out from your current account. Now enter your username and password.

After entering a password, enter the code available in Google Authenticator app.

If you are able to log in successfully, that confirms you configured two-factor authentication successfully.
How to disable two-factor authentication
Login into a Linux system and open a terminal screen. Shoot the below command to open the common-auth file in the admin role:
sudo nano /etc/pam.d/common-auth
Delete the below piece of code and save the file.
auth required pam_google_authenticator.so nullok
This will disable two-factor authentication. Now you can again log in without using two-factor authentication.
Conclusion
This blog guide you to enable two-factor authentication on your Linux distribution by using the Google Authenticator app. You can also use another authenticator app to configure two-factor authentication. There are a lot of options to add an extra layer of security, and using Authenticator is one of them. We will also explore other possibilities that can be used as a second layer of authentication.
Subscribe us to receive more such articles updates in your email.
If you have any questions, feel free to ask in the comments section below. Nothing gives me greater joy than helping my readers!
Disclaimer: This tutorial is for educational purpose only. Individual is solely responsible for any illegal act.


